

Hosting a Node.js application on Vercel for free
A technical guide on how to host your Node.js applications for free on Vercel.


Assumptions
- You have an existing node application.
- You know your way around Github.
- You can install npm packages via CLI.
As a developer, hosting your application online is relevant for testing and sharing the amazing software you've built, hence hosting your node application for free should be easier, faster and without notable performance tradeoffs.
Meet Vercel
Vercel is a cloud platform for static sites and "Serverless Functions". It enables developers to host websites and web services that deploy instantly, scale automatically without worrying about DevOps dependencies.
Preparing to host on Vercel
First, we go serverless:
Your node application would be hosted on Vercel as a Serverless Function. Serverless functions abstract functionality away from server infrastructure by running isolated, event-driven functions that have single-use applications. On Vercel, Serverless Functions enable running code on-demand without needing to manage your own infrastructure, provision servers, or upgrade hardware. So for example, you built an API with a route that returns an "Hello World" response, like:
// [index.js]

const express = require("express");

const port = process.env.PORT || 4000;
const app = express();

app.get('/hello-world', (request, response) => {
  response.send('Hello World!');
});

app.listen(port, () => {
  console.log(`[server]: Server is running at http://localhost:${port}`);
});
- your entire server app would be hosted on Vercel as a single purpose Serverless Function. Remember, "Serverless functions abstract functionality away from server infrastructure", which means that Vercel would need access to your server app as a module, so pay attention to what comes next.
Next, export your app:
Your server app should be exported as a module like this:
// [index.js] with server app export.

const express = require("express");

const port = process.env.PORT || 4000;
const app = express();

app.get('/hello-world', (request, response) => {
  response.send('Hello World!');
});

app.listen(port, () => {
  console.log(`[server]: Server is running at http://localhost:${port}`);
});

// Export the Express API
module.exports = app;
Next, add a configuration file (Legacy Method):
As you know, config files tell external services how to interact with your codebase in particular contexts. For instance, in the context of deploying to Heroku, you'd need a Procfile which is basically a config file that heroku looks at to spin off a dyno with the right configurations for your project.
To deploy on Vercel, you'd need a vercel.json file at the root of your project directory like this:
{
  "version": 2,
  "builds": [
    {
      "src": "index.js",
      "use": "@vercel/node"
    }
  ],
  "routes": [
    {
      "src": "/(.*)",
      "dest": "index.js"
    }
  ]
}
Understanding the config:
- version: Specifies the platform version Vercel should use for deployment.
- builds: Specifies a list of build descriptions whose src value references each serverless function you want to the deploy.
- src: a path to the serverless function (e.g:
index.jsin the sample code). - use: An npm module of the runtime required by the build process, (e.g
@vercel/node).
- src: a path to the serverless function (e.g:
- routes: Specifies which routes points to which serverless function. The config above routes all requests to index.js.
- src: route source.
- dest: path to the serverless function it points to.
Or create an api folder (Vercel Recommended):
Vercel now recommends creating an api folder at the root of your project directory and placing your Serverless Functions inside (e.g: index.js in the sample code). As an advantage, no extra configuration is needed for this setup process.
Hosting on Vercel
Sign up on Vercel:
To create a Vercel account, visit Get started with Vercel and continue with your preferred authentication option. Vercel provides authentication with Github, Gitlab, BitBucket and email.
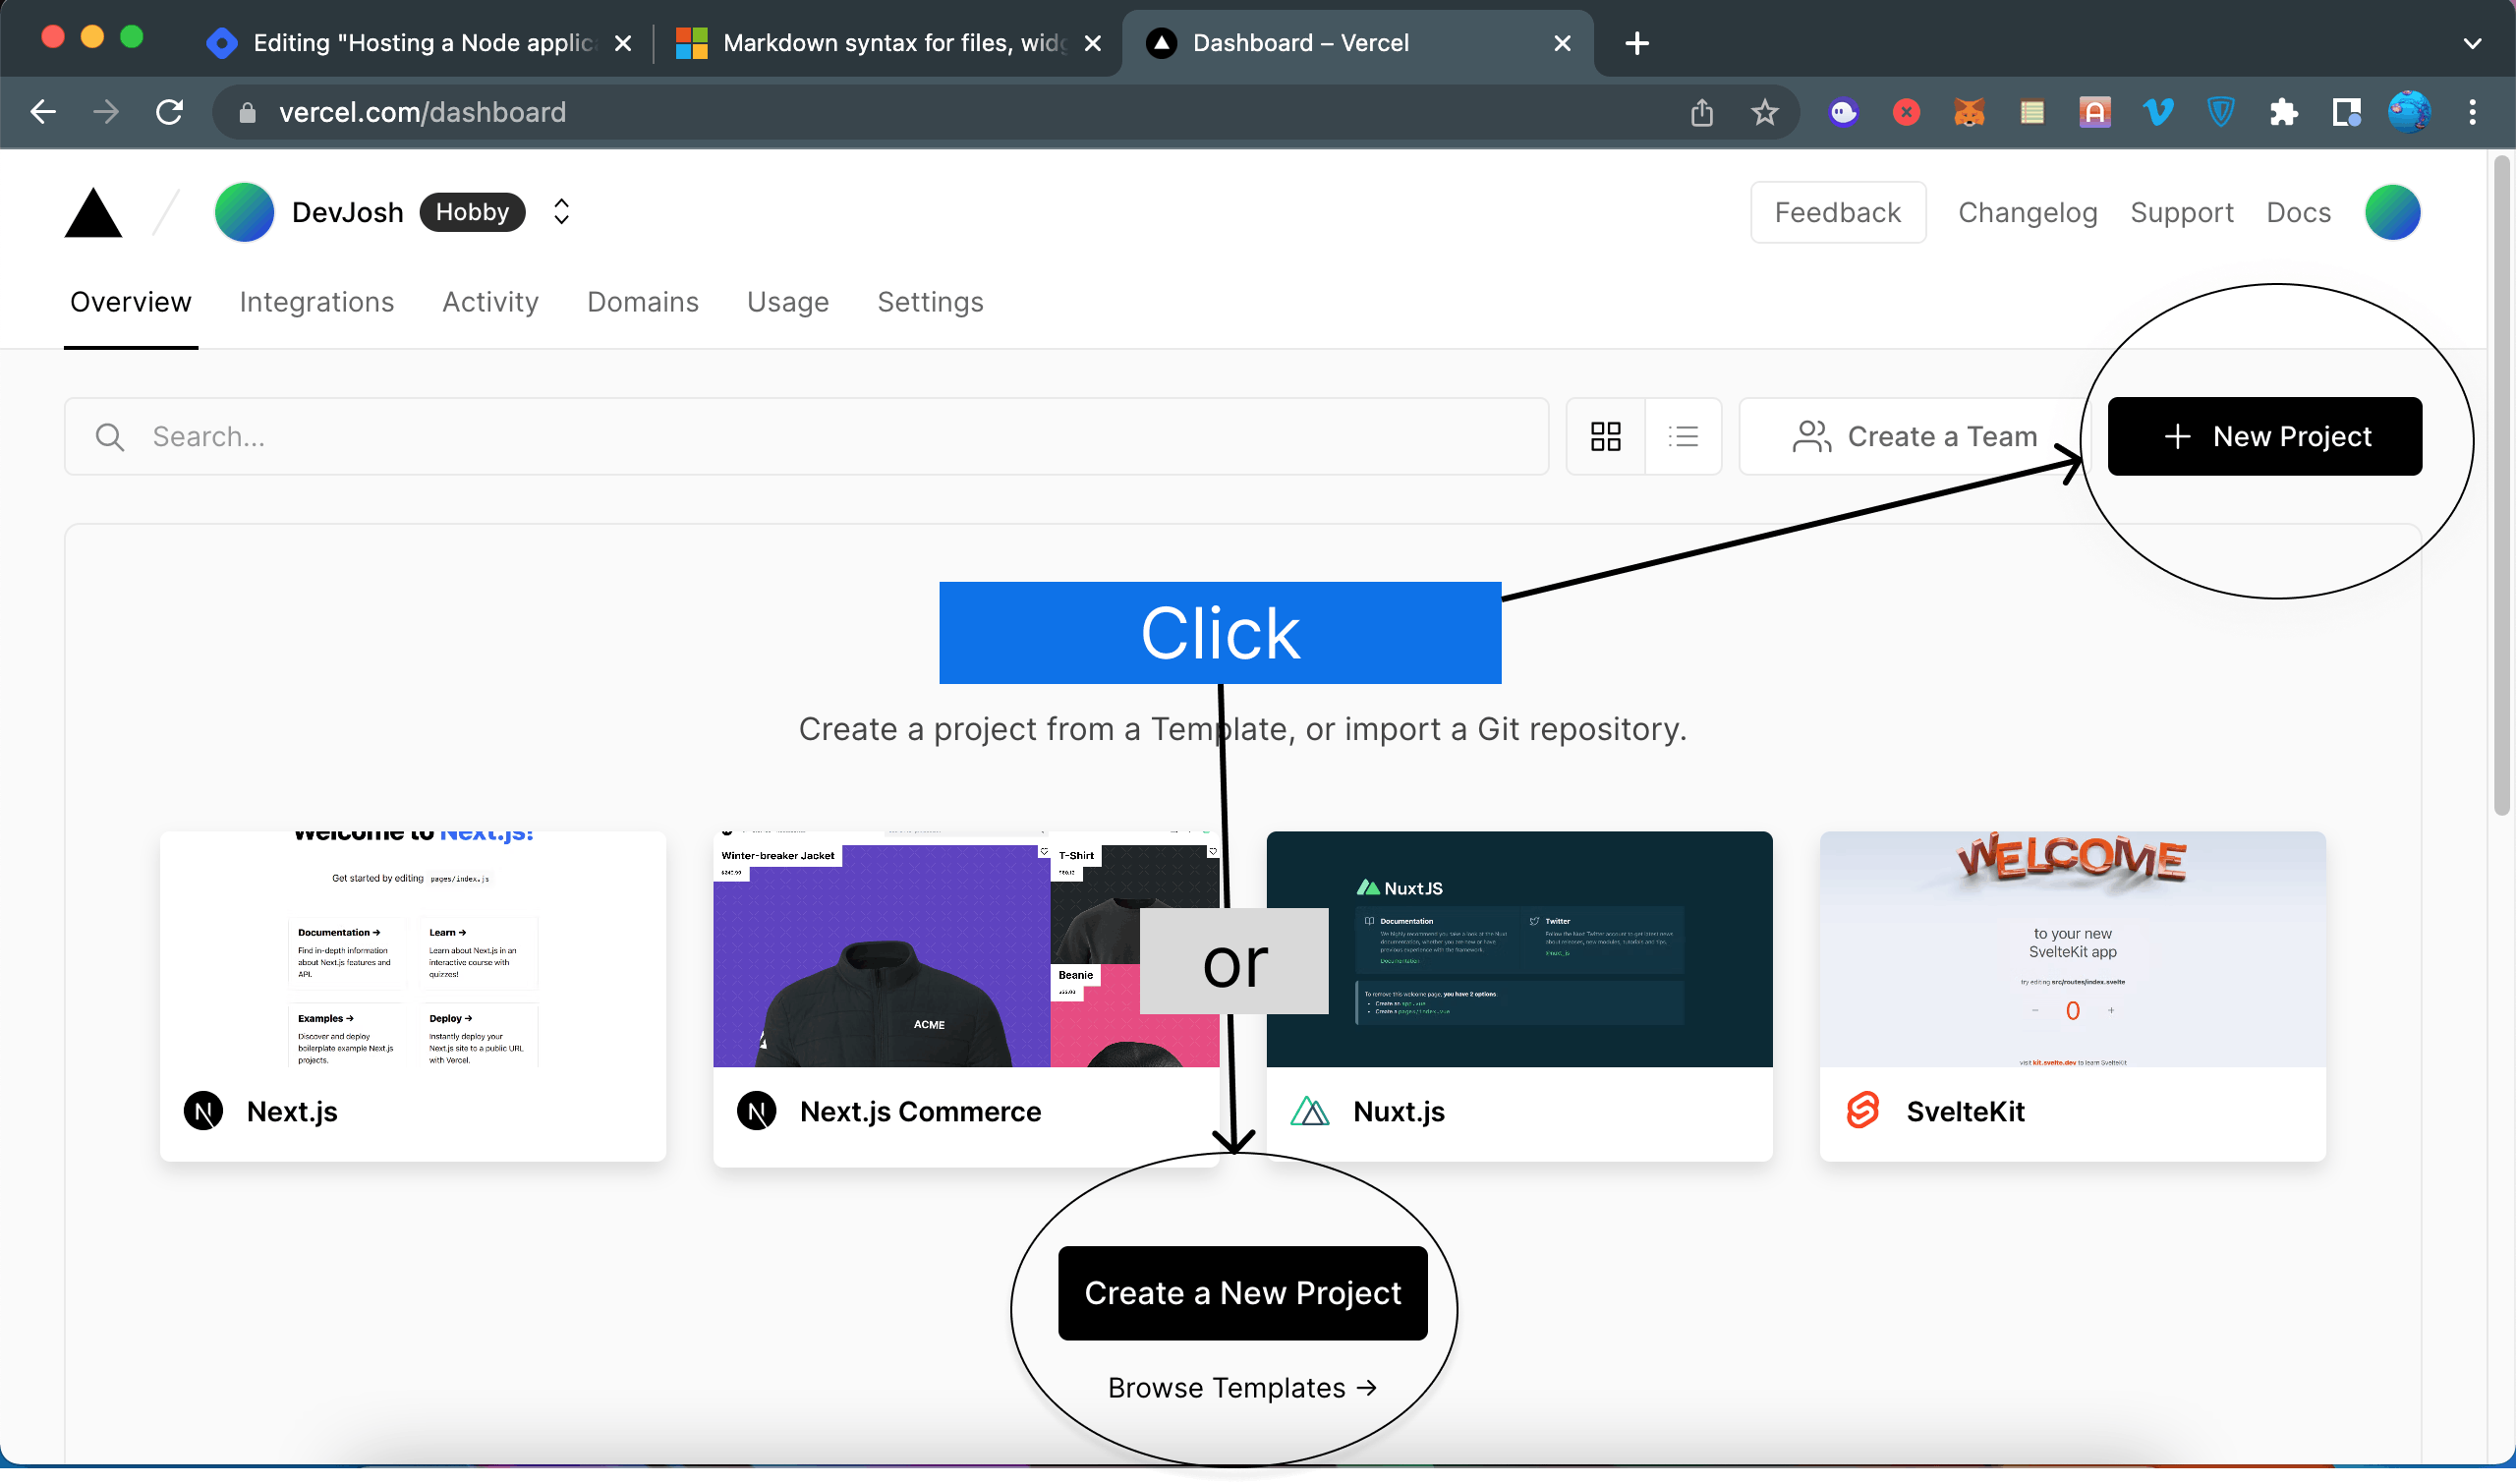
Create a project:
On your Vercel dashboard, click on New Project or Create a New Project
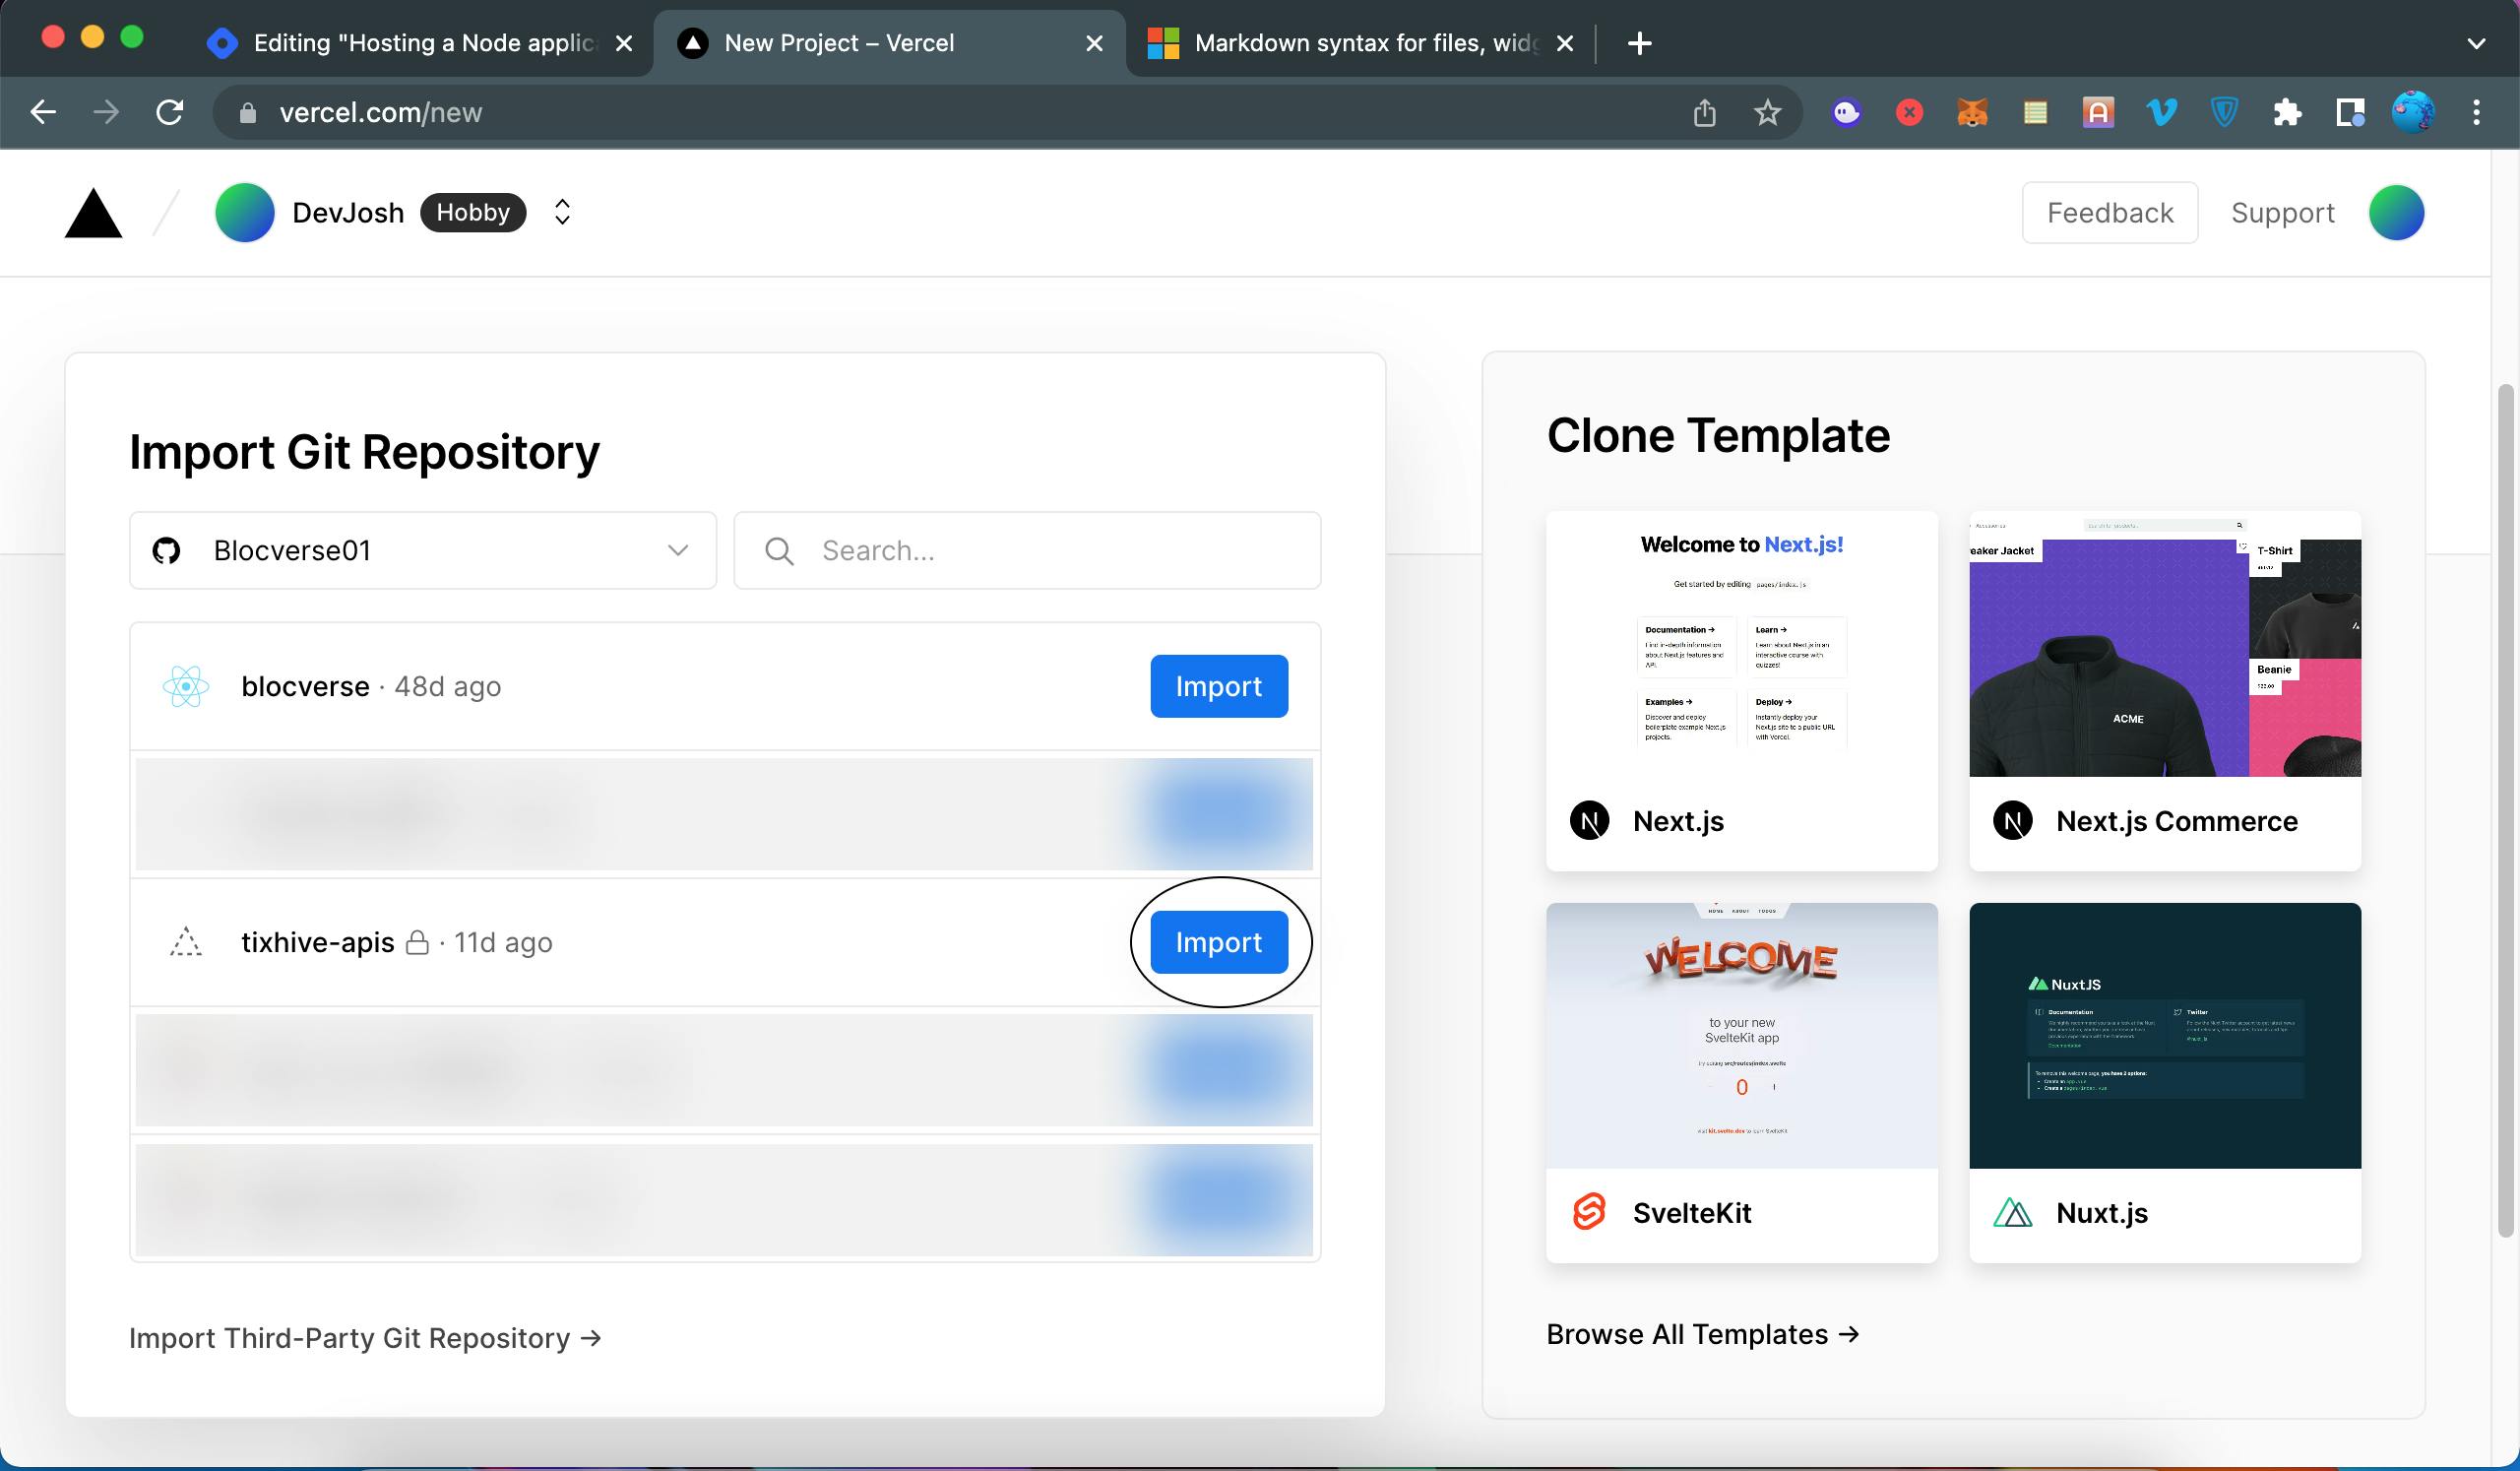
Connect via Github and deploy:
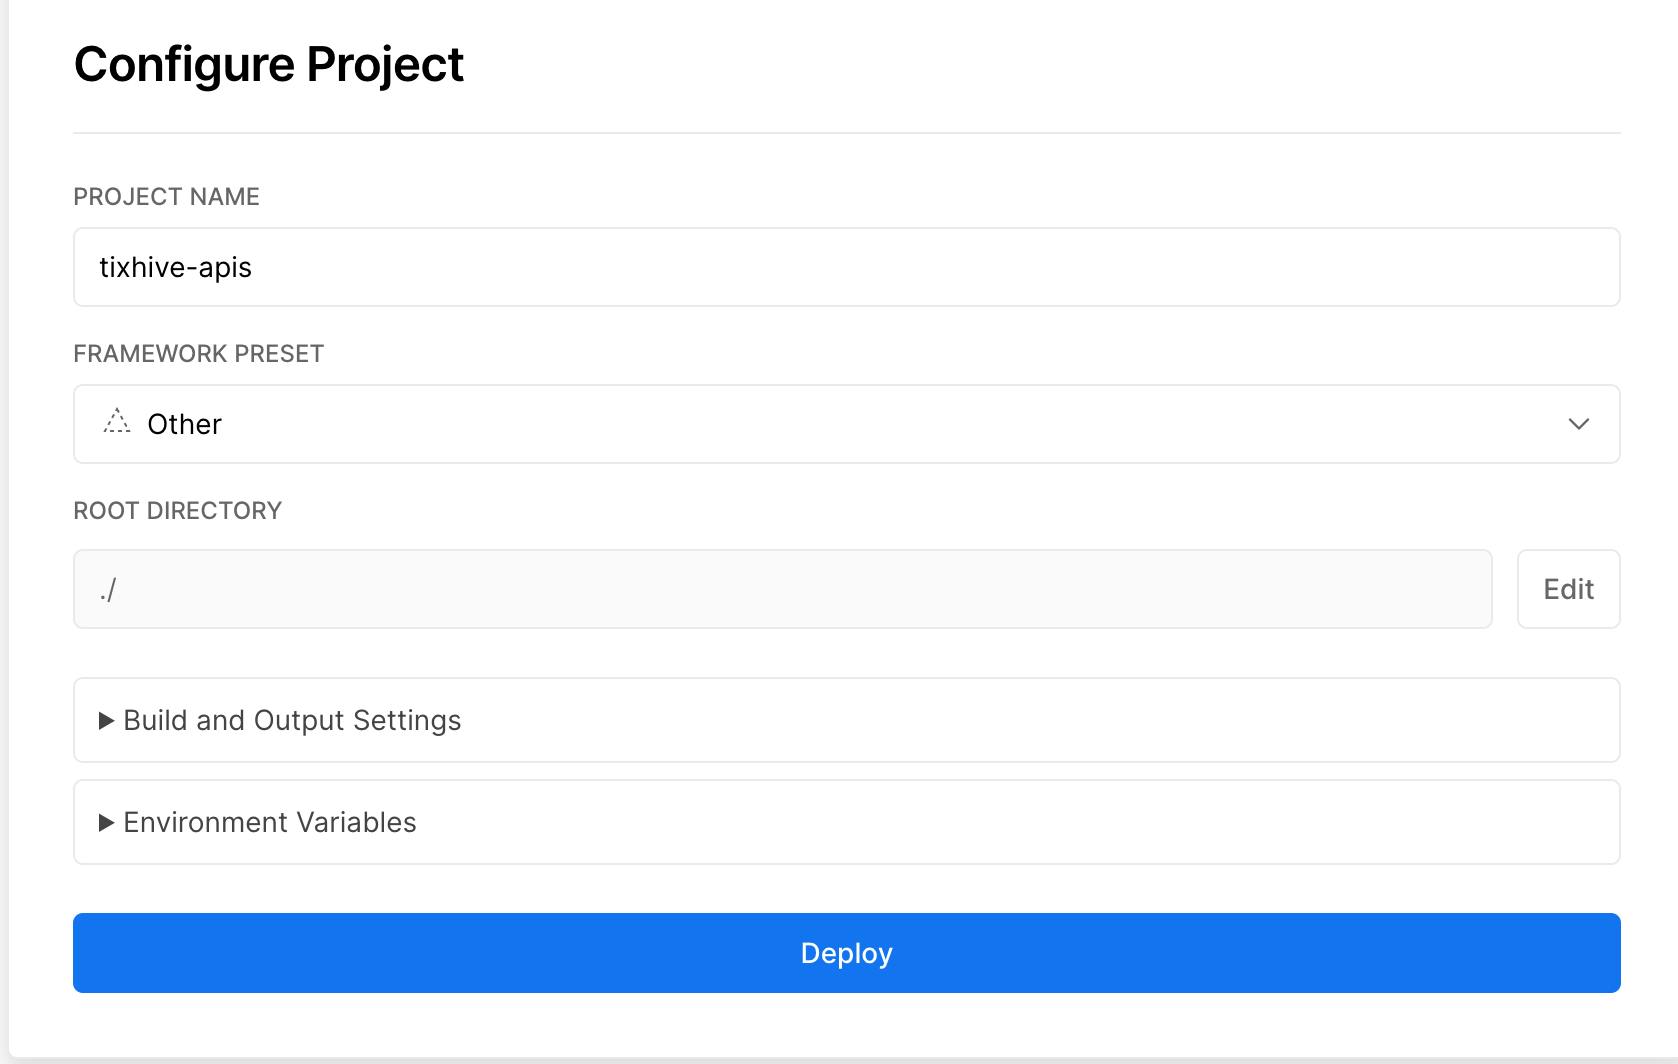
Select the github repo you want to import code from. After clicking the import button, you should see the configure project tab where you can customize your root directory, build commands and setup environment variables. Leaving the configurations as they are work just fine.
Import Github repo
Configure your project and deploy
Or deploy via Vercel CLI:
Install Vercel CLI
Run this command in your terminal to install Vercel CLI.
npm i -g vercel
Login to your Vercel account via CLI
Run vercel login in your terminal
vercel login
Deploying on Vercel
Run vercel in your terminal and follow the interactive steps to deploy your app.
vercel
Setup questions and recommended answers:
✅ Set up and deploy “path/to/project-folder”? [Y/n]: Type Y and press the enter key.
✅ Which scope do you want to deploy to?: Use the arrow keys to select a scope and the enter key to choose the selected scope.
✅ Link to existing project? [y/N]: y => yes, N => no. Type N if you do not have an existing project to link to.
✅ What’s your project’s name?: Enter a name for your project or press the enter key to use the suggested one.
✅ In which directory is your code located?: press the enter key to choose the current directory or specify otherwise.
After building and deployment is completed, you should see an output like this: which contains a link to inspect your deployment and a live domain to interact with your app.